Are you ready to dive into the world of cutting-edge technology with the V48M 2898 IC? If you’re curious about how this powerful integrated circuit can revolutionize your projects, then keep on reading! In this blog post, we’ll explore the history, components, functionality, and provide a step-by-step guide on how to harness the full potential of the V48M 2898 IC. Let’s embark on this exciting journey together!
History of the V48M 2898 IC and its uses
The V48M 2898 IC has a rich history that dates back to its conception in the early days of semiconductor technology. Originally designed for industrial applications, this versatile integrated circuit quickly found its way into various consumer electronics due to its efficiency and reliability.
Over the years, engineers have continued to refine and optimize the design of the V48M 2898 IC, making it a staple component in modern electronic devices. Its uses range from power management systems to audio amplifiers, demonstrating its adaptability across different industries.
As technology evolves, so does the functionality of the V48M 2898 IC, with new features and capabilities being added with each iteration. Today, this IC remains a crucial building block in many electronic devices, contributing to their performance and overall user experience.
Components and Functionality of the V48M 2898 IC
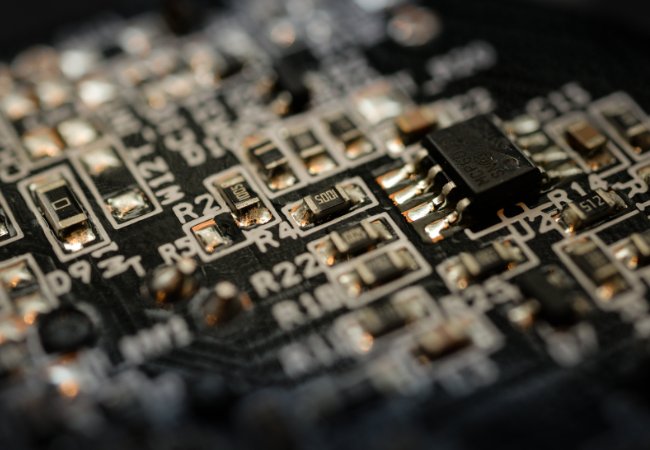
The V48M 2898 IC is a versatile integrated circuit that packs a powerful punch in a compact package. With its advanced components, this IC is designed to deliver high performance and reliability in various electronic devices.
One of the key components of the V48M 2898 IC is its microcontroller unit, which acts as the brain of the operation, coordinating tasks and processing data efficiently. Additionally, it features analog-to-digital converters for accurate signal conversion and digital communication interfaces for seamless connectivity.
The functionality of the V48M 2898 IC extends to controlling motors, sensors, displays, and more with precision. Its robust design ensures stable operation even in demanding environments.
Understanding the components and functionality of the V48M 2898 IC opens up a world of possibilities for innovation and creativity in electronics projects.
Step-by-Step Guide on How to Use the V48M 2898 IC:
Step 1: Gather all necessary materials. Before you begin using the V48M 2898 IC, make sure you have all the tools and components required for a successful setup. This includes the IC itself, a compatible device, and any additional accessories needed.
Step 2: Preparing the IC for use. Take time to carefully inspect the V48M 2898 IC for any damage or defects before proceeding. Ensure that it is clean and free from any debris that could interfere with its functionality.
Step 3: Connecting the IC to…
A. Step 1: Gather all necessary materials
Are you ready to dive into the world of the V48M 2898 IC? The first step in using this powerful integrated circuit is to gather all the necessary materials. Before you begin, make sure you have everything on hand to ensure a smooth process.

Start by collecting theitself, along with any specific tools or equipment required for its use. Check that you have a clean and well-lit workspace to work in comfortably. Having a clutter-free environment can help streamline your workflow and prevent any unnecessary distractions.
Next, gather any additional components or accessories needed for your project. This could include connectors, cables, power sources, or anything else specified in the instructions. Double-check each item to avoid any delays once you start working with the IC.
By taking the time to gather all necessary materials beforehand, you set yourself up for success when it comes to using the effectively. Stay organized and prepared as you move forward with your project!
B. Step 2: Preparing the IC for use
Now that you have gathered all the necessary materials for using the, let’s move on to Step 2: Preparing the IC for use.
Carefully inspect the IC for any visible damage or defects. It is crucial to ensure that it is in perfect condition before proceeding further.
Next, familiarize yourself with the pin configuration of the. This will help you correctly identify and connect each pin during the setup process.
Before handling the IC, make sure to discharge any static electricity by grounding yourself properly. Static electricity can potentially damage sensitive electronic components like this IC.
Clean your workspace and ensure there are no distractions that could interfere with your preparation process. A clutter-free environment will help you focus better on setting up the accurately.
By following these steps diligently, you are now ready to move on to connecting and utilizing this advanced integrated circuit effectively. Stay tuned for more insights into maximizing its potential!
C. Step 3: Connecting the IC to
Step 3: Connecting the IC to
Once you have prepared the and gathered all necessary materials, it’s time to connect the IC. Carefully follow the manufacturer’s guidelines for proper connection to ensure optimal performance. Make sure all connections are secure and double-check for any loose wires or components.
By following these steps, you will be able to effectively utilize the in your projects. Remember that practice makes perfect, so don’t get discouraged if it takes a few tries to get everything set up correctly. With patience and persistence, you’ll soon be harnessing the power of this versatile integrated circuit for your electronics projects!